Shelly is an inexpensive relay from Allterco Robotics that can be controlled via Wi-Fi using HTTP, cloud or smart home products. The deciding factor for me compared to common smart home products was not only the price, but mainly the possibility to access a Shelly via web interface from the local network and also to perform actions without depending on clouds or third party apps. Shellys can be operated directly from mains voltage and are perfectly suited for installation in other devices or electrical installation boxes due to their size of about a matchbox.
To remotely control a garage door opener, I used a Shelly 2.5, which is the two relay version. The garage door opener is old and has high standby consumption and is not used daily, so I would like to have the ability to remotely turn the opener on/off and initiate the opening/closing of the garage door. There is a dedicated app from the manufacturer, but I don’t think it works that well and involves accessing the devices from the internet. My solution is controlled by a PHP script from the local network. The PHP script to control the Shelly Relay can be stored for example on a NAS or a miniature computer like the Raspberry Pi. The page can then be accessed via Wi-Fi on a smartphone to open the gate.
Implementation
- Settings and testing are most easily done on the desk. To do this, supply the Shelly with mains voltage at the terminals L (phase) and N (neutral). Both terminals L are connected internally, so it does not matter which L terminal is used.
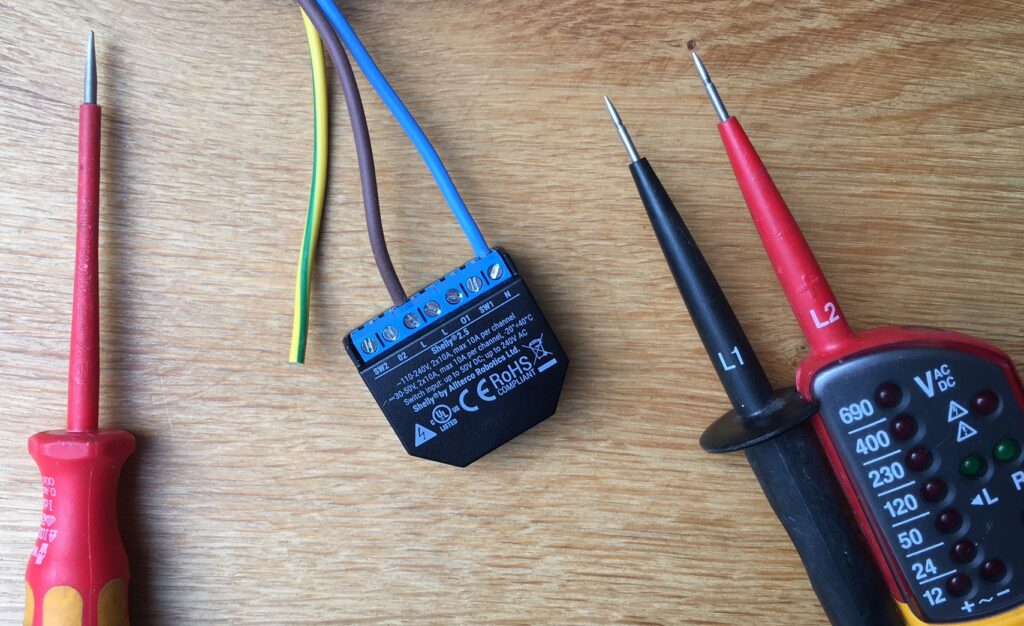
- After a few seconds, the Shelly provides its own wireless network named shellyswitch25-…. Connect to this network with a computer. No password is required.
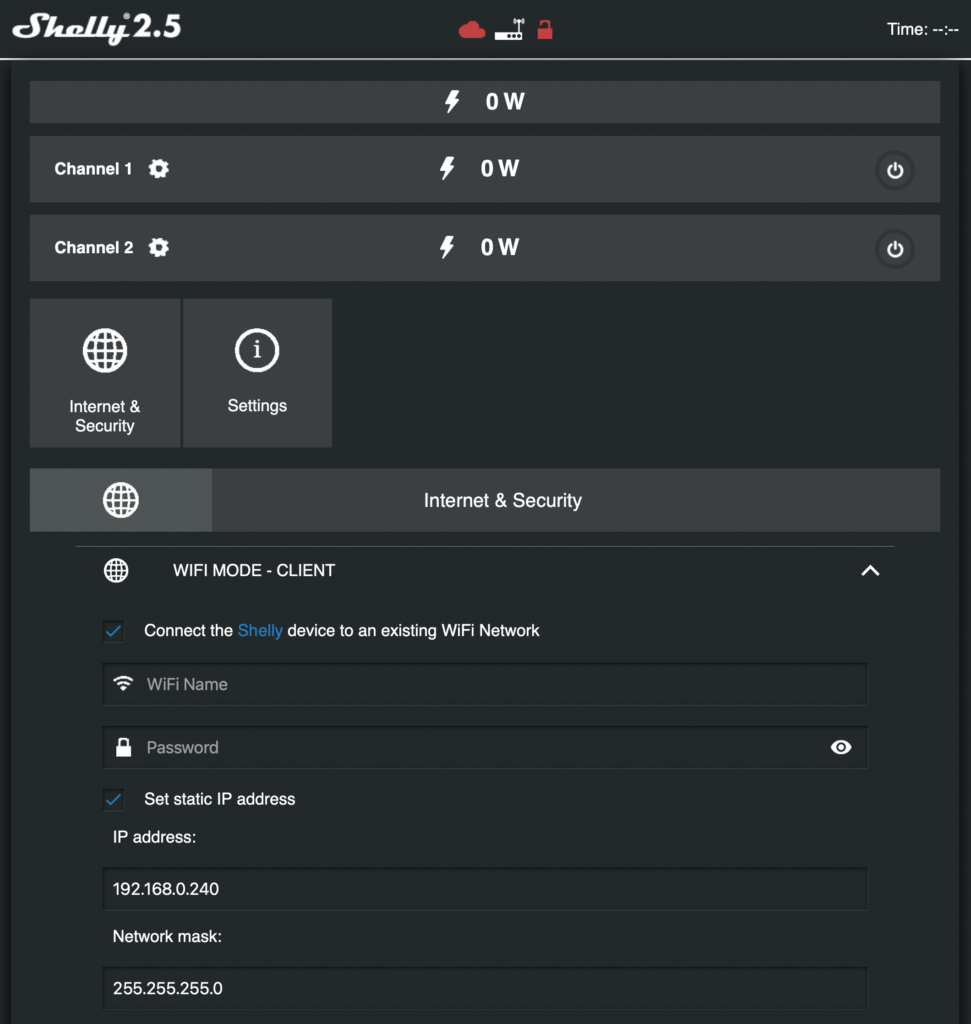
- Open the address 192.168.33.1 in the web browser. Now the web interface should be visible.
- A connection to the Wi-Fi network of the building can now be established via “Internet & Security”. Enter the name of the network and the password. In addition, a static IP should be assigned to the Shelly so that the device can be addressed later by the PHP script for opening the garage door. Furthermore, the IP address of the router should be entered at Gateway and DNS (for date, time and firmware updates).
- Reconnect the computer to the Wi-Fi of the building. The temporary shellyswitch25-… WiFi network should now be gone and the Shelly should be accessible in the web browser via the IP address just entered. Then perform a firmware update and set username and password.
- Name the two relays of the Shelly. I will use the first relay to switch the power supply of the drive and the second relay as a trigger to open / close the garage door. Therefore, I set the second relay to turn off one second after it is turned on.
- Customize PHP script, upload to a device on local network with web server and test.
PHP Code: Control Shelly by PHP
<?php
session_start();
//Edit credentials and secretkeys
$username = 'user';
$password = 'pass';
$random1 = 'secretkey1';
$random2 = 'secretkey2';
$hash = md5($random1.$password.$random2);
$self = $_SERVER['REQUEST_URI'];
//Enter credentials set before at Shelly Webinterface
$devices = array(
array("[ShellyIP]", "[ShellyUser]", "[ShellyPass]")
);
function callURL($method, $url, $data){
$curl = curl_init();
switch ($method){
case "POST":
curl_setopt($curl, CURLOPT_POST, 1);
if ($data)
curl_setopt($curl, CURLOPT_POSTFIELDS, $data);
break;
case "PUT":
curl_setopt($curl, CURLOPT_CUSTOMREQUEST, "PUT");
if ($data)
curl_setopt($curl, CURLOPT_POSTFIELDS, $data);
break;
default:
if ($data)
$url = sprintf("%s?%s", $url, http_build_query($data));
}
curl_setopt($curl, CURLOPT_URL, $url);
curl_setopt($curl, CURLOPT_HTTPHEADER, array(
'Content-Type: application/json',
));
curl_setopt($curl, CURLOPT_RETURNTRANSFER, 1);
curl_setopt($curl, CURLOPT_HTTPAUTH, CURLAUTH_BASIC);
$result = curl_exec($curl);
if(!$result){die("Connection Failure");}
curl_close($curl);
return $result;
}
function getRelayStatus($deviceNo, $relayNo) {
global $devices;
$get_data = callURL('GET', 'http://'.$devices[$deviceNo][1].':'.$devices[$deviceNo][2].'@'.$devices[$deviceNo][0].'/relay/'.$relayNo, false);
$response = json_decode($get_data, true);
if($response["ison"] === TRUE)
return true;
if($response["ison"] === FALSE)
return false;
}
function getRelayStatusHTMLOutput($deviceNo, $relayNo) {
$response = getRelayStatus($deviceNo, $relayNo);
if($response === true)
return "<span style=\"font-size: 40px; color: mediumseagreen;\"><i class=\"fas fa-plug\"></i></span><br><strong>Ein</strong>";
if($response === false)
return "<span style=\"font-size: 40px; color: darkgray;\"><i class=\"fas fa-plug\"></i></span><br><strong>Aus</strong>";
}
function toggleRelay($deviceNo, $relayNo) {
global $devices;
callURL('POST', 'http://'.$devices[$deviceNo][1].':'.$devices[$deviceNo][2].'@'.$devices[$deviceNo][0].'/relay/'.$relayNo.'?turn=toggle', false);
}
?>
<!doctype html>
<html lang="de">
<head>
<meta charset="utf-8">
<meta name="viewport" content="width=device-width, initial-scale=1">
<link href="https://cdn.jsdelivr.net/npm/bootstrap@5.1.0/dist/css/bootstrap.min.css" rel="stylesheet" integrity="sha384-KyZXEAg3QhqLMpG8r+8fhAXLRk2vvoC2f3B09zVXn8CA5QIVfZOJ3BCsw2P0p/We" crossorigin="anonymous">
<link href="https://cdnjs.cloudflare.com/ajax/libs/font-awesome/5.15.4/css/all.min.css" rel="stylesheet">
<title>Shelly Switch</title>
</head>
<body>
<?php
// logout
if(isset($_GET['logout'])) {
unset($_SESSION['login']);
}
// user is logged in
if (isset($_SESSION['login']) && $_SESSION['login'] == $hash) {
if (isset($_POST['toggle'])) {
toggleRelay($_POST['deviceNo'], $_POST['relayNo']);
}
?>
<div class="container">
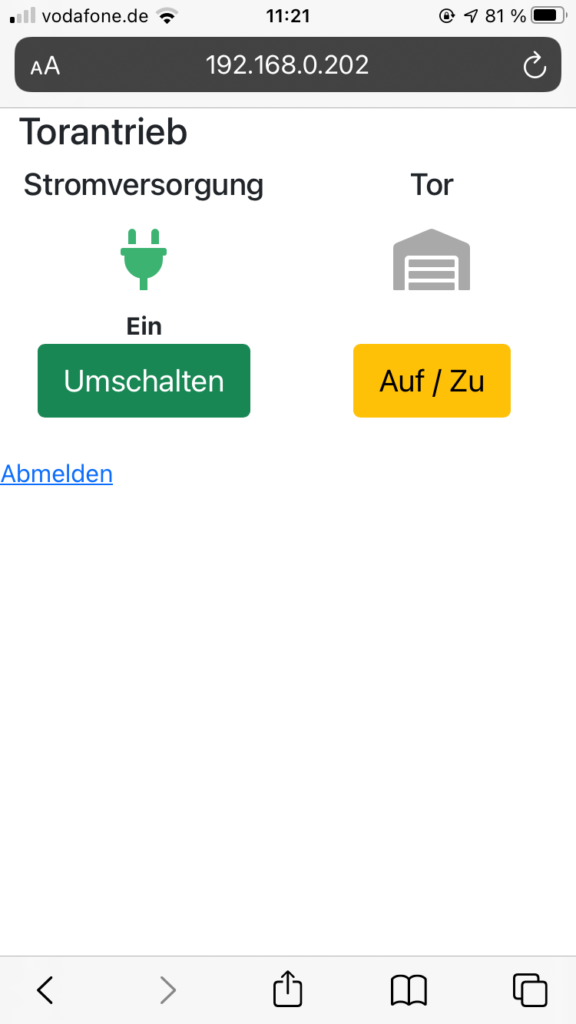
<h2>Garage door opener</h2>
<div class="row d-flex justify-content-center">
<div class="col text-center" >
<h5>Power</h5>
<?php echo getRelayStatusHTMLOutput(0,0); ?>
<form action="<?php echo $self; ?>" method='post'>
<input type="hidden" name="deviceNo" value="0">
<input type="hidden" name="relayNo" value="0">
<input class="btn btn-lg btn-success" type="submit" name="toggle" value="Toggle">
</form>
</div>
<div class="col text-center">
<h5>Door</h5>
<span style="font-size: 40px; color: darkgray;"><i class="fas fa-warehouse"></i></span></br>
<form action="<?php echo $self; ?>" method='post'>
<input type="hidden" name="deviceNo" value="0">
<input type="hidden" name="relayNo" value="1">
<input class="btn btn-lg btn-warning" type="submit" name="toggle" value="Open / Close">
</form>
</div>
</div>
</div>
<br>
<a href="?logout=true">Logout</a>
<?php
}
else if (isset($_POST['submit'])) {
if ($_POST['username'] == $username && $_POST['password'] == $password){
$_SESSION["login"] = $hash;
header("Location: $_SERVER[PHP_SELF]");
} else {
display_login_form();
echo '<p>Wrong user / pass.</p>';
}
}
else {
display_login_form();
}
?>
</body>
</html>
<?php
function display_login_form() {
global $self; ?>
<form action="<?php echo $self; ?>" method='post' class="form-signin">
<h2 class="h3 mb-3 font-weight-normal">Please log in</h2>
<label for="username" class="sr-only">User</label>
<input type="text" name="username" id="username" class="form-control" placeholder="Benutzer" required autofocus>
<label for="password" class="sr-only">Password</label>
<input type="password" name="password" id="password" class="form-control" placeholder="Passwort" required>
<button class="btn btn-lg btn-primary btn-block" name="submit" type="submit">Submit</button>
</form>
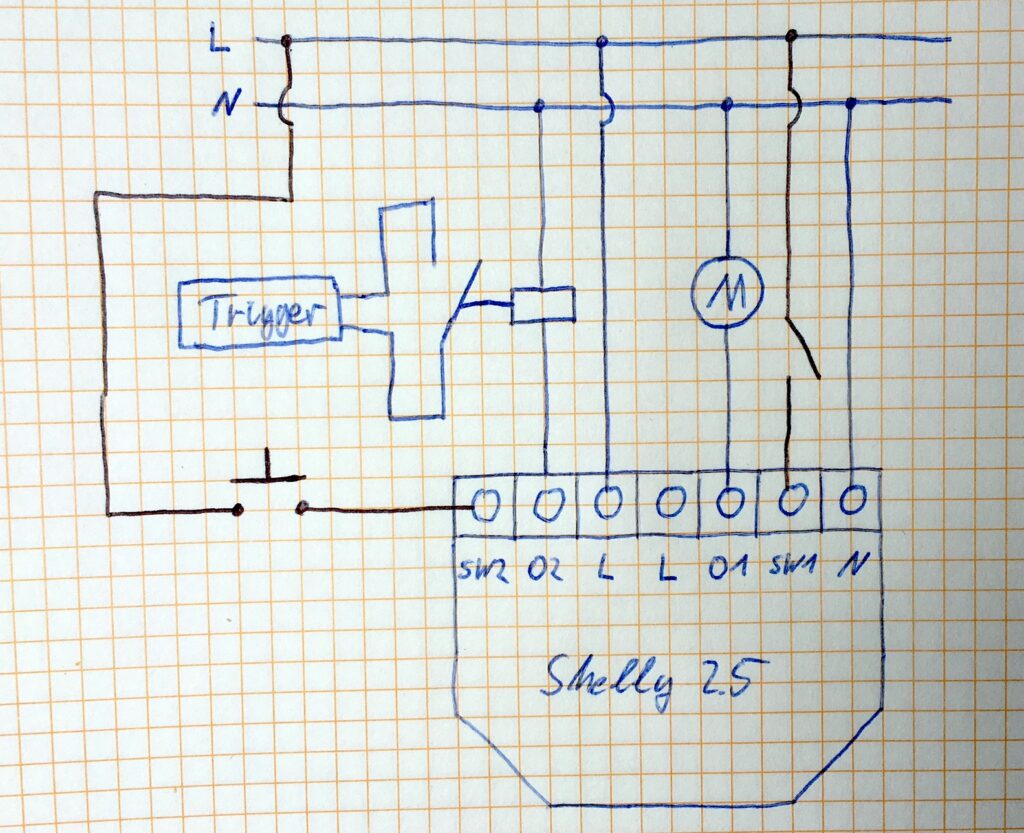
<?php } ?>- Then the Shelly can be moved and installed in the garage door drive housing. To trigger the gate control, my actuator requires another relay, because the gate actuator control works with low voltage and there is mains voltage at the output of the Shelly. I connected the Shelly as follows. Shown in black are a switch and a push button that allow the gate to be operated directly from the garage, i.e. without a smartphone. These two components are optional.
Update: Poor WLAN reception with Shelly
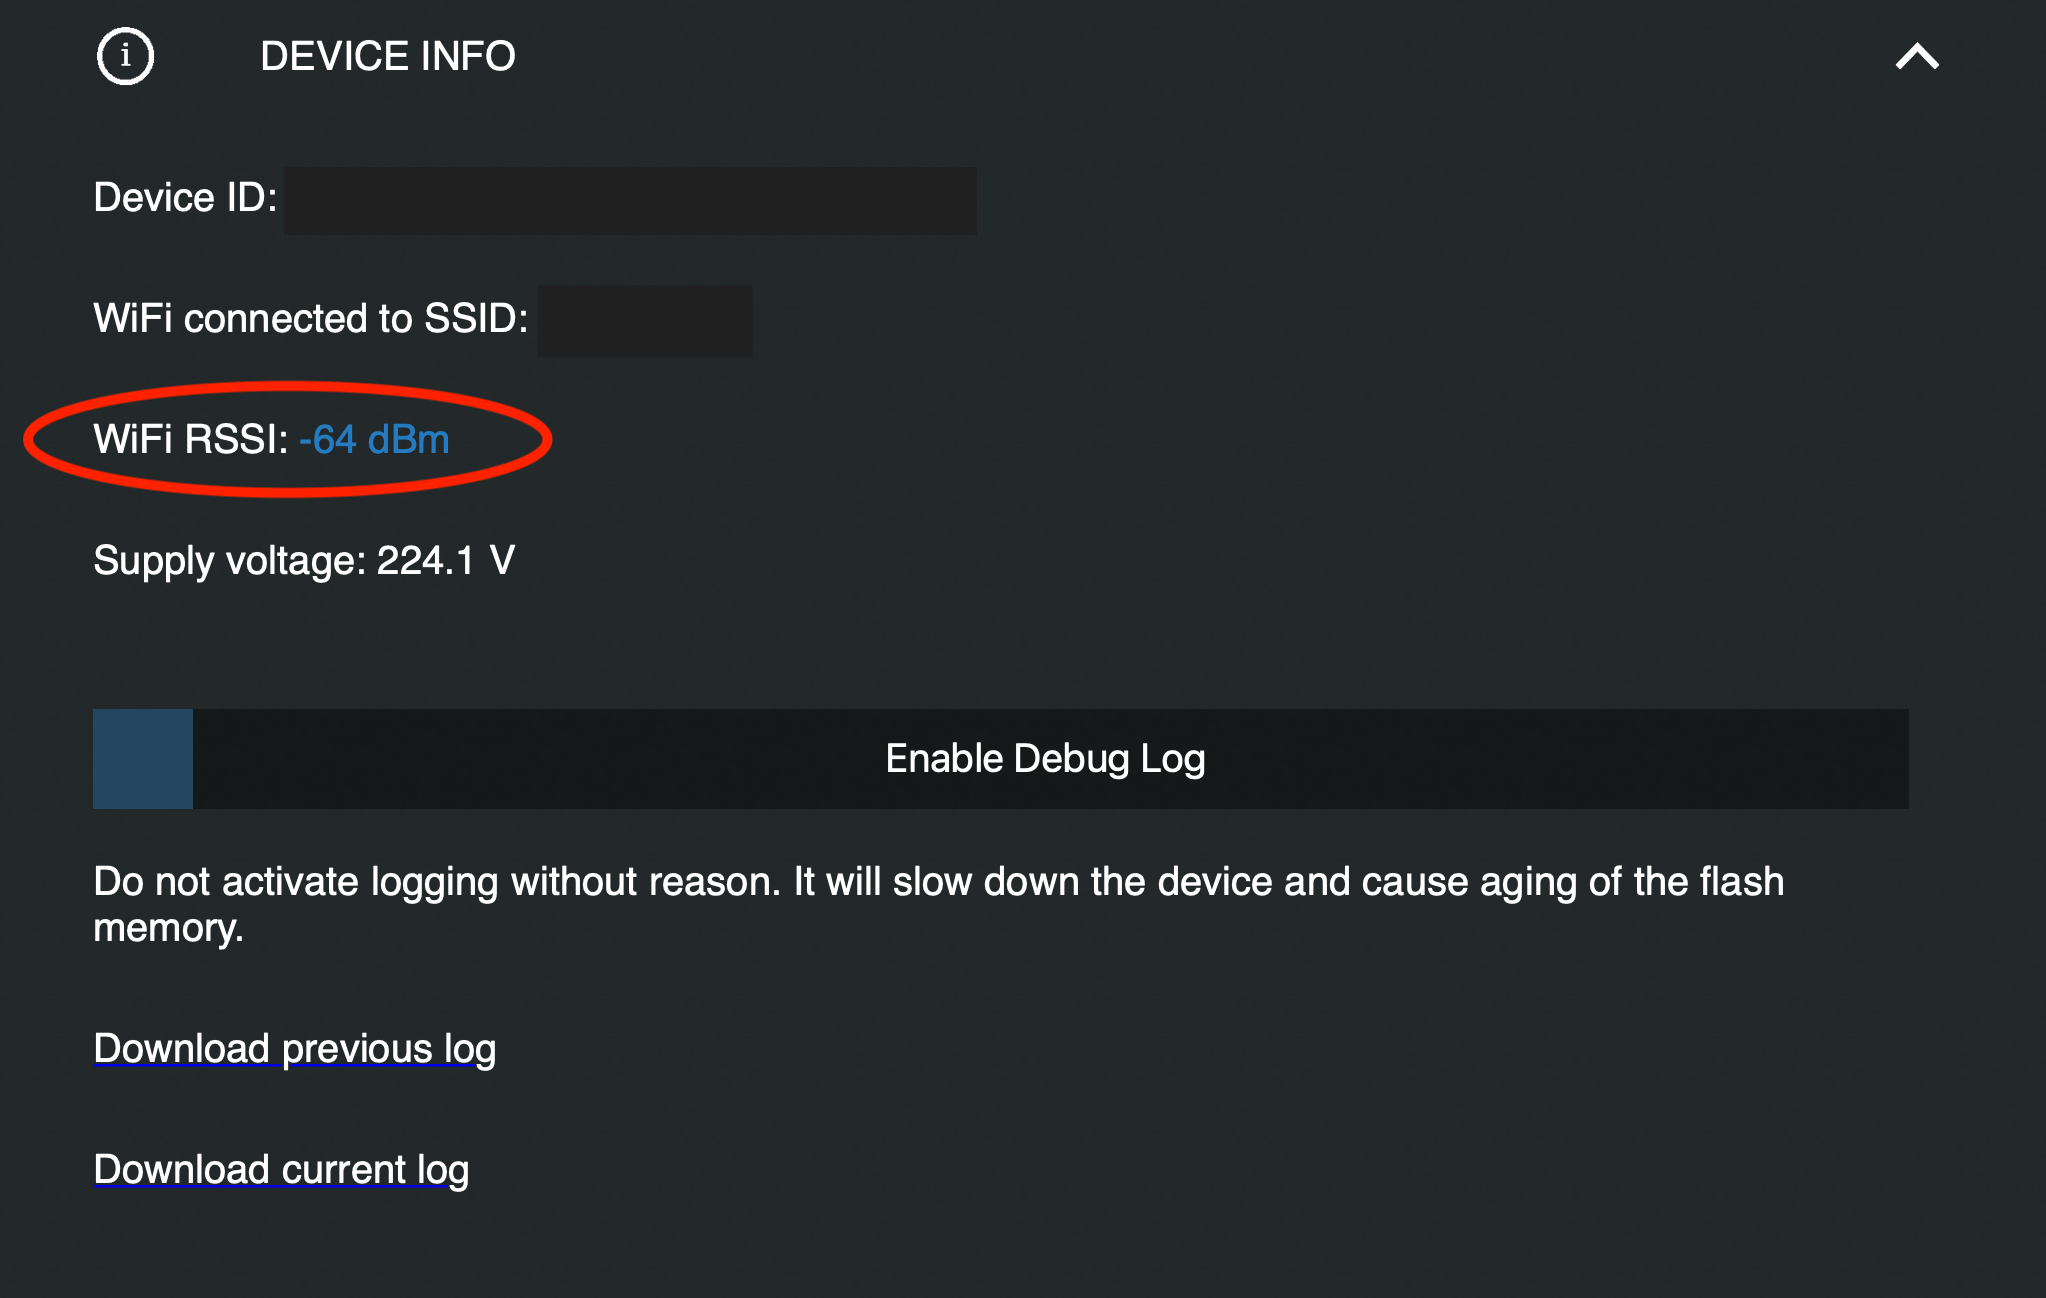
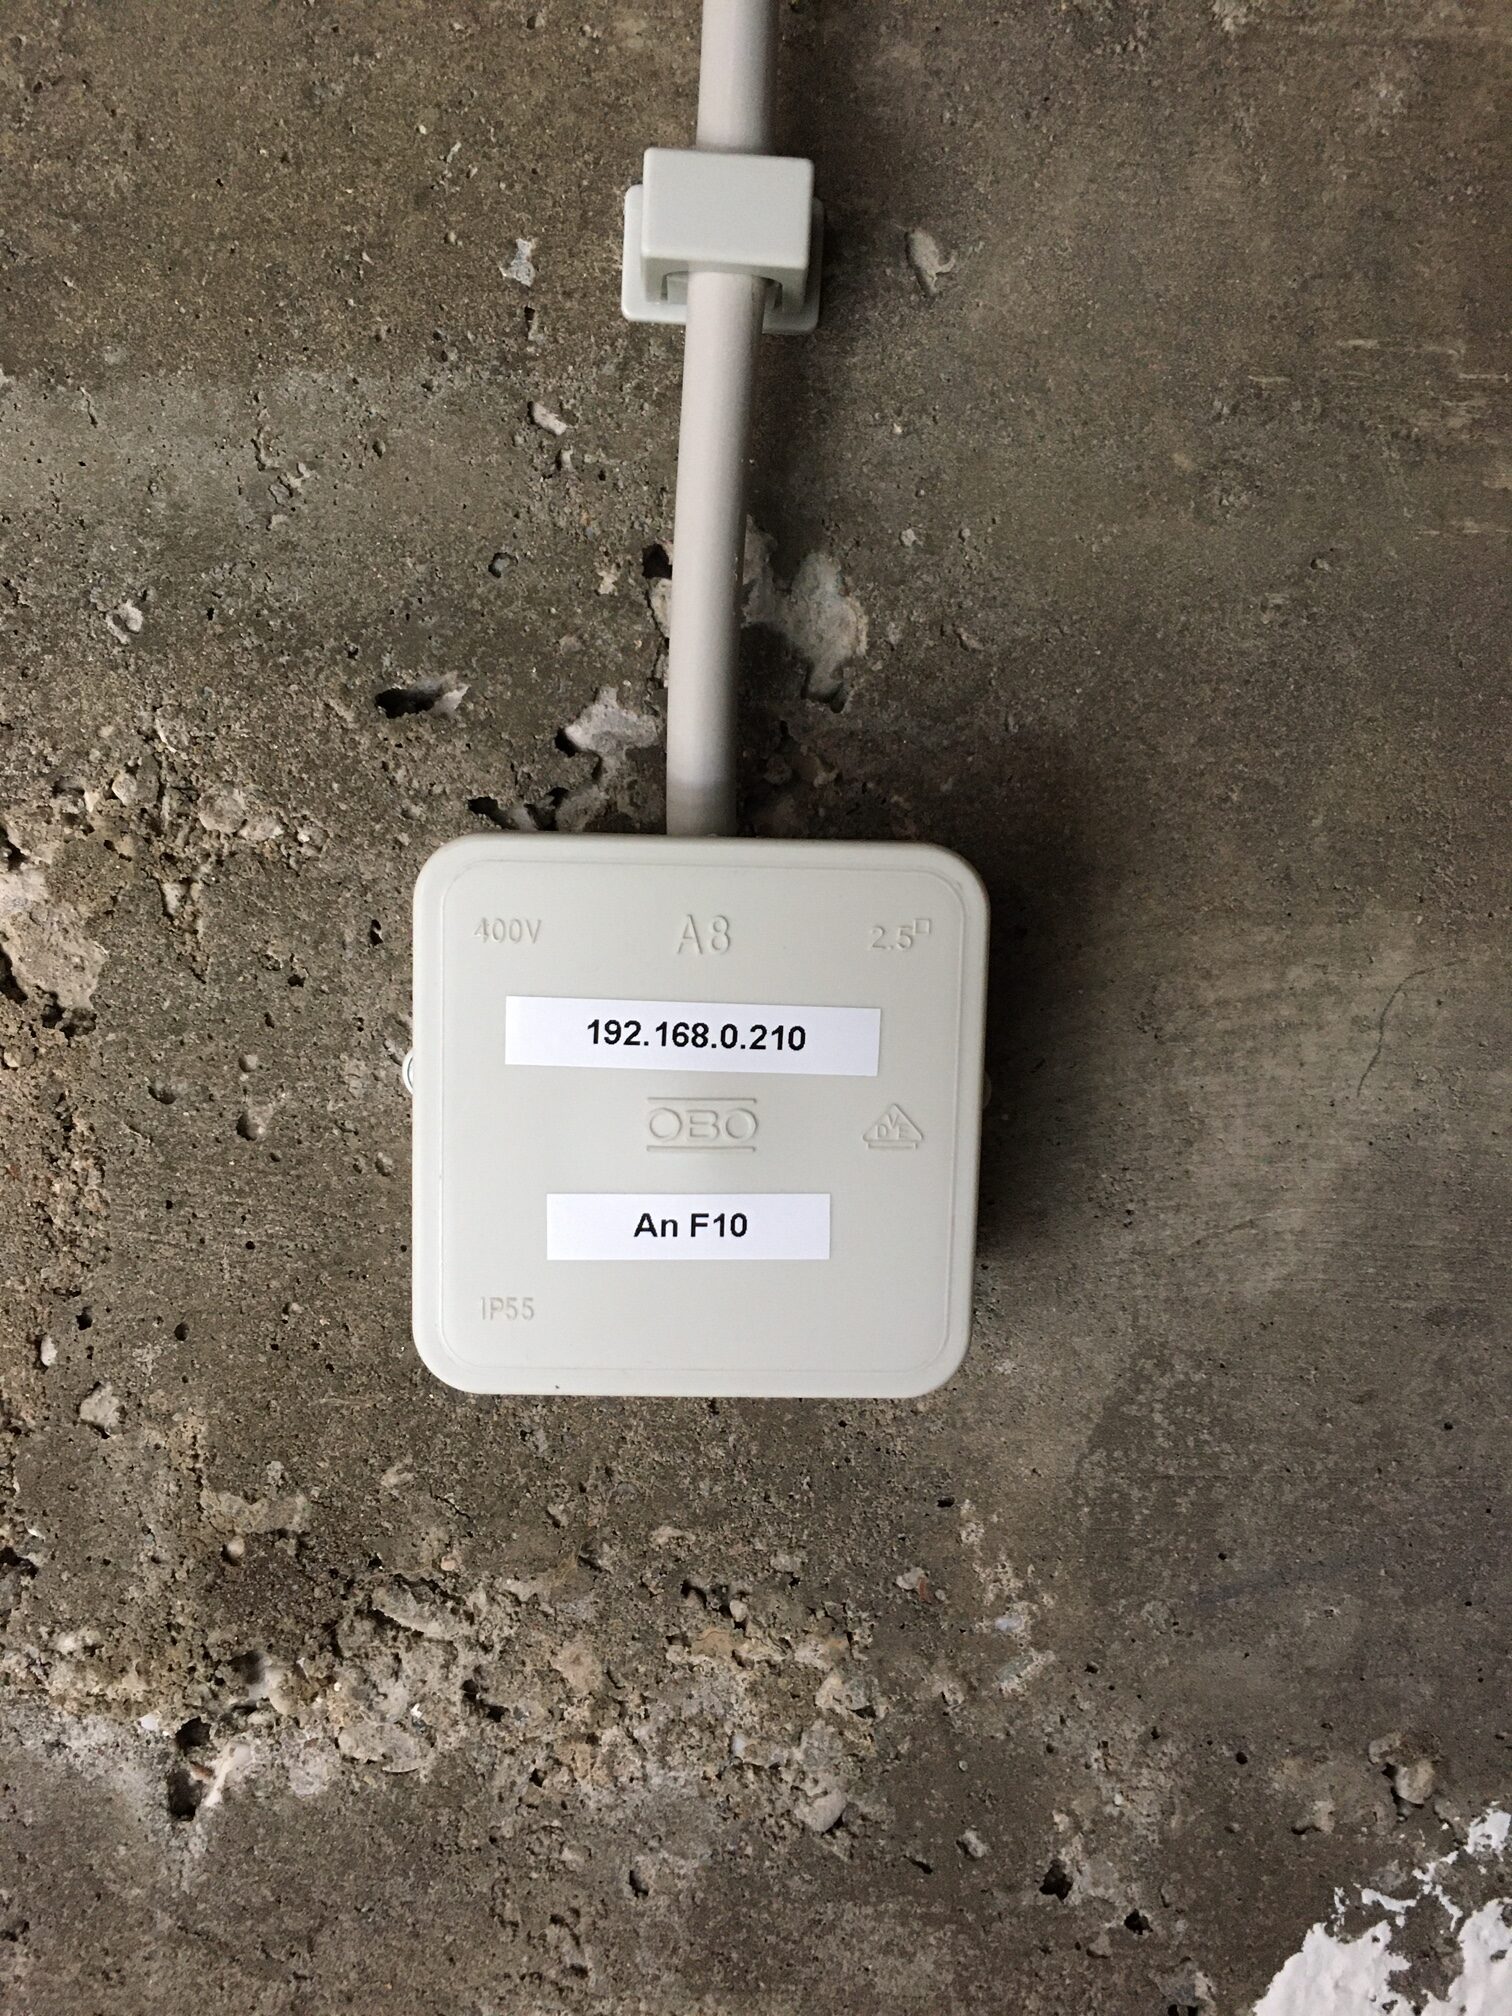
After a few days of testing, it became clear that the signal strength of the Wi-Fi network for the Shelly in the garage door opener housing is insufficient. Sometimes there was a connection to the access point, sometimes the connection was lost. To solve the problem, I reconnected the Shelly to a power cable with an extension cord. This allows the device to be moved freely around the room. In the web interface of the Shelly the signal strength can be read in the header. However, the system with only three colors is too imprecise for the best possible positioning. The WiFi RSSI value (for Received Signal Strength Indicator) can be read on the ‘Settings’ page under ‘Device Info’. The smaller the value, the better the signal strength. When moving the Shelly around, the value is updated periodically. I have made the experience that not only the position, but also the orientation of front and back makes a serious difference. After I found a position with good signal strength, I drew the position of the Shelly on the ceiling with a pencil and placed a junction box with the Shelly inside at that position. Since then, the Shelly has had uninterrupted, good WLAN reception.